A portable monitor for Mac is an external display designed to run reliably from a MacBook's USB‑C/Thunderbolt video output while staying lightweight and bus‑power friendly. Most buying mistakes come from confusing connector shape with video capability, picking resolution that scales poorly in macOS, and assuming "wide gamut" equals accurate color without profiling.
Quick Verdicts on Choosing a Portable Monitor for Mac
- Prioritize a monitor that explicitly supports USB‑C DisplayPort Alt Mode; a USB‑C plug alone does not guarantee video.
- Don't pay extra for "Thunderbolt" unless you truly need Thunderbolt features; many Mac setups work perfectly with USB‑C DP Alt Mode.
- Choose resolution based on macOS scaling comfort, not marketing labels; sharpness depends on pixel density and how you scale.
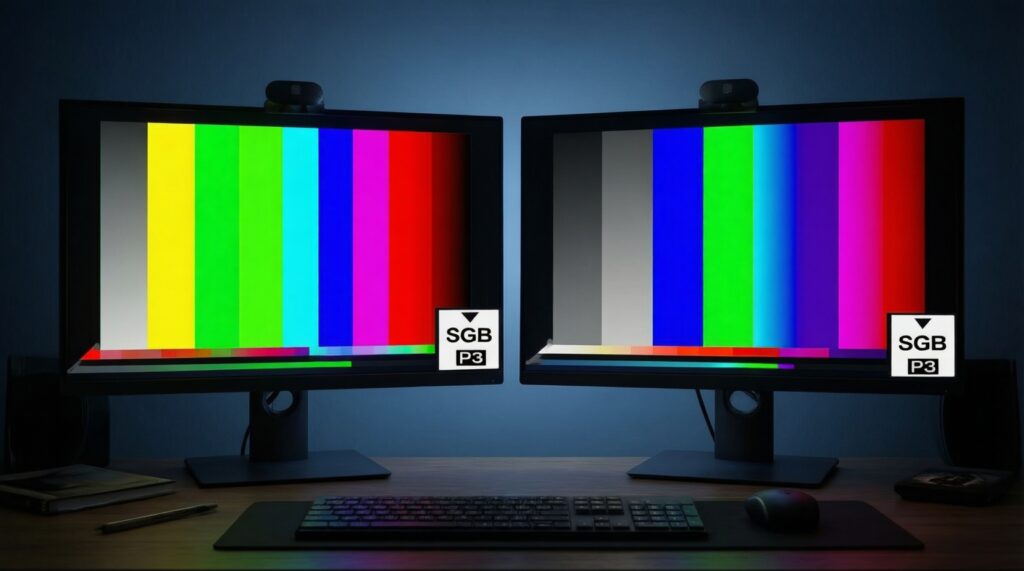
- For design work, look for realistic color targets (sRGB or P3) and plan for a simple calibration/profile step.
- Higher refresh rate helps motion and cursor feel, but it won't fix text clarity or color issues.
- Power Delivery, cable quality, and a stable stand matter more in daily use than one extra port.
Common Myths About Portable Monitors and macOS
Myth: "Any USB‑C portable monitor will just work with any Mac." Reality: macOS needs a real video path (typically DisplayPort Alt Mode over USB‑C or Thunderbolt). Many "USB‑C" displays are fine, but some combinations silently fall back to USB data-only, requiring adapters or special drivers.
Myth: "Thunderbolt automatically means better image quality." Reality: image quality is dominated by panel specs (resolution, gamut, uniformity) and your scaling settings. Thunderbolt can simplify docking and bandwidth sharing, but it's not a magic picture upgrade.
Myth: "4K always looks better on a portable screen." Reality: macOS scaling choices and the screen's physical size decide whether you get comfortable UI sizing without weird sharpness tradeoffs.
Quick prevention checklist (myths → reality)
- Verify the monitor lists "USB‑C DisplayPort Alt Mode" (or "Thunderbolt input")-not only "USB‑C".
- Confirm you can run it with one cable for video + power (or note if it needs a second power input).
- Expect to adjust macOS display scaling on first use; "Default" is not always best.
- If you care about color, plan to install/choose an ICC profile and validate with a test image.
Connectivity Deep Dive: USB‑C vs Thunderbolt with Macs
On Macs, a portable monitor typically receives video in one of three ways: (1) native DisplayPort Alt Mode over USB‑C, (2) Thunderbolt display tunneling, or (3) USB graphics (driver-based) as a fallback. Most "plug-and-play" setups are #1 or #2; #3 is where people hit lag, CPU load, or compatibility surprises.
USB‑C (DisplayPort Alt Mode): what it is and common mistakes
- How it works: the Mac sends DisplayPort video through the USB‑C port; the monitor decodes it directly.
- Typical mistake: using a charge-only USB‑C cable; it powers the monitor but carries no video.
- Typical mistake: assuming a USB‑C hub/dongle always preserves DP Alt Mode; some don't, or they reduce supported modes.
Thunderbolt: when it matters and what it won't fix
- How it works: Thunderbolt tunnels PCIe + DisplayPort and can support robust docking workflows.
- When it matters: you want one-cable docking with high-end peripherals, multiple displays through a dock, or a workflow built around Thunderbolt devices.
- What it won't fix: bad panel uniformity, weak contrast, inaccurate factory color, or uncomfortable macOS scaling.
What to check before you "ซื้อจอพกพาสำหรับ Mac"
- Port type on your Mac (USB‑C / Thunderbolt) and whether you'll connect direct or through a hub.
- Monitor input specs: "USB‑C DP Alt Mode" vs "Thunderbolt"; avoid vague listings.
- Cable spec: use a known good USB‑C cable rated for video (and adequate power), not a bundled unknown.
- Power Delivery direction: does the monitor charge the Mac, or does it consume power from the Mac?
- If you compare "จอพกพา USB-C สำหรับ Mac ราคา" listings, treat unusually cheap bundles as cable/PD-quality risks until proven otherwise.
Resolution and Pixel Density - What Actually Changes on macOS
macOS doesn't just "run at native resolution"; it renders the UI with scaling choices that trade off UI size and effective sharpness. The same resolution can feel crisp on one size and awkward on another. "จอพกพา 4K สำหรับ MacBook" can be excellent, but only if you like the scaling options it produces on that screen size.
Typical scenarios where resolution choice matters
- Coding + terminals: prioritize comfortable text size at a crisp scaling setting; avoid forcing tiny UI just to "fit more".
- Side-by-side documents: you want stable window layouts; pick a scaling mode that doesn't constantly reshuffle widths.
- Photo/video timelines: more pixels help, but only if your UI remains usable without eye strain.
- Presentations/client review: consistent sizing and legibility matter more than maximum pixel count.
- Travel work: smaller screens with very high resolution can push you into aggressive scaling-test if menus and text feel right.
Quick prevention checklist (resolution & scaling)
- On first connect: System Settings → Displays → try 2-3 scaling options; keep the one that preserves sharp text without tiny UI.
- Prefer "looks like" comfort over chasing native pixels; your eyes and layout stability are the real metrics.
- If the monitor advertises multiple modes, confirm it supports the mode you want over your chosen connection path (direct vs hub).
Color Accuracy, Profiles and Practical Calibration Steps
"Wide gamut" claims don't guarantee accurate color on a Mac. You need three things aligned: the panel's real gamut capability, a sensible target (sRGB or P3 depending on your work), and a correct profile. If you're shopping "จอพกพา สีตรง sRGB DCI-P3 สำหรับ Mac", plan for a quick profile check even if the listing sounds confident.
Benefits you can realistically get
- More consistent editing decisions when your monitor's profile matches your typical delivery space (often sRGB; sometimes P3).
- Fewer surprises between the MacBook's built-in display and the portable monitor once both are profiled sensibly.
- More reliable soft-proofing when you intentionally choose the right working space in your apps.
Limitations that cause the most "why do colors look off?" moments
- Factory modes labeled "sRGB" or "P3" may be poorly tuned; names aren't verification.
- Brightness changes perceived color; matching brightness between displays often matters more than tiny gamut differences.
- One profile can't fix panel uniformity issues (corners, tint shifts) or poor viewing angles.
Quick calibration workflow (no special gear required)
- Set a stable brightness you can maintain (don't calibrate at max brightness if you won't use it).
- Choose the monitor's most neutral preset (often "Standard" or "Custom"), disable any dynamic contrast features.
- In macOS Displays, confirm the correct color profile is selected; if the monitor vendor provides an ICC profile, try it and compare.
- Validate with known reference images and skin tones; if it looks consistently too warm/cool, switch preset or profile rather than chasing app-by-app fixes.
Refresh Rate, Latency and When Higher Hz Matters for Mac Users
Higher refresh rates can make scrolling and pointer motion feel smoother, but they don't correct blurry text, poor scaling, or incorrect profiles. The most common mistake is paying for Hz while ignoring cable capability and power constraints, then running at a lower mode anyway.
Typical errors to avoid
- Assuming "120/144Hz support" is guaranteed over any USB‑C cable; the link mode and cable quality can limit what macOS offers.
- Expecting higher Hz to fix motion blur caused by slow pixel response; refresh rate and response time are different constraints.
- Forgetting to select the refresh rate in macOS after connecting (some setups default to a conservative mode).
- Chasing gaming specs on a travel monitor and ending up with worse brightness/color consistency.
- Overvaluing Hz for static work (docs, coding); invest first in comfortable scaling and reliable color.
Quick prevention checklist (refresh & feel)
- After connecting: check available refresh rates in System Settings → Displays and pick the intended one.
- Test with your real workload: scrolling long pages, moving windows, and video playback.
- If the monitor drops frames or flickers, try a shorter/better cable and avoid chaining through questionable hubs.
Portability, Power Delivery, Stands and Real‑World Ergonomics
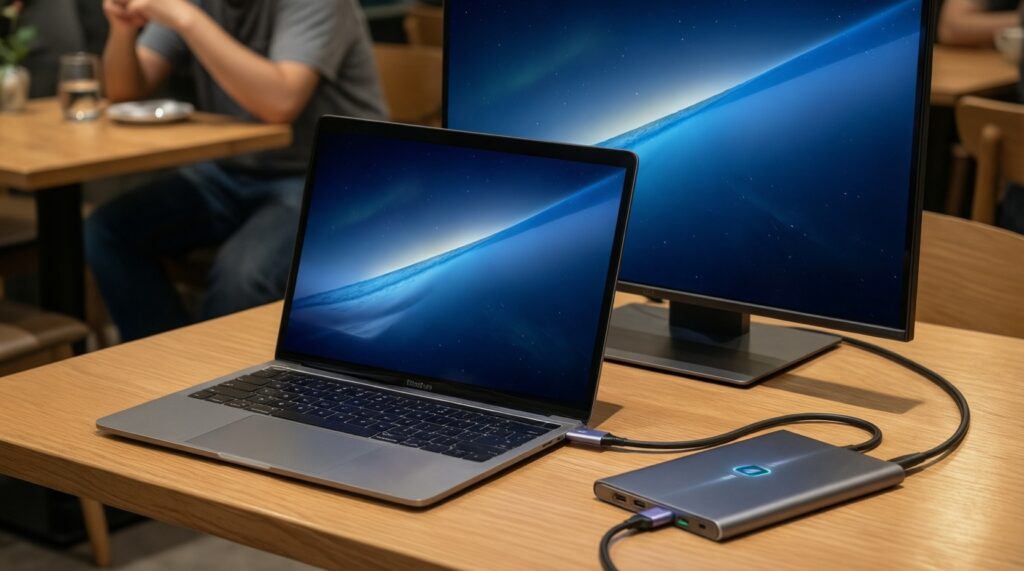
Travel usability is where portable monitors win or lose. A great panel becomes frustrating if it drains your MacBook quickly, wobbles on a café table, or forces a bad neck angle. If you're comparing "จอพกพา Thunderbolt สำหรับ Mac" options, separate "nice docking story" from "actually stable and power-sane on the road".
Mini case: one-cable setup that doesn't sabotage battery
You work from a MacBook in cafés in Thailand, switching between battery and wall power. The goal is a one-cable display that stays stable, doesn't randomly disconnect, and keeps ergonomics acceptable.
- Pick the connection path: connect the monitor directly to the MacBook (avoid hubs first) to validate baseline stability.
- Decide power direction: if you're on battery, prefer a monitor that can run reliably without demanding high power draw; if you're on AC, feed power to the monitor so it doesn't drain the Mac.
- Lock ergonomics: use a rigid stand or folio that keeps the top bezel near eye level; don't accept a "laptop-flat" angle for long sessions.
Quick prevention checklist (travel ergonomics & PD)
- Confirm whether the monitor supports Power Delivery pass-through (charging the Mac) or only consumes power.
- Carry one proven video-capable USB‑C cable as your "known good" baseline for troubleshooting.
- Check stand stability on a small table; if it flexes, budget for a compact stand.
- Keep brightness at a sustainable level; it improves comfort and reduces power stress.
Concise Compatibility Answers and Edge Cases
Will any USB‑C portable monitor work with a MacBook?
No-your Mac must output video over that port and the monitor must accept USB‑C DisplayPort Alt Mode (or Thunderbolt). A USB‑C connector can still be power/data-only on some devices and cables.
Do I need a Thunderbolt portable monitor to get the best quality?
Not usually. Image quality depends on the panel and settings; Thunderbolt mainly helps with docking-style connectivity and bandwidth sharing.
Why does my portable monitor power on but show "No Signal"?
The most common causes are a charge-only cable, a hub that doesn't pass DP Alt Mode, or the monitor using a USB graphics mode that needs software. Test direct-to-Mac with a known video-rated USB‑C cable.
Is a "จอพกพา 4K สำหรับ MacBook" always a safe buy?
Only if you like the macOS scaling options it produces on that screen size. 4K can look great, but it can also push you into scaling choices that feel too small or awkward.
How do I avoid washed-out or over-saturated colors?
Select the correct macOS color profile for the monitor and avoid "Vivid" presets for color work. If you're shopping "จอพกพา สีตรง sRGB DCI-P3 สำหรับ Mac", plan to validate with reference images and adjust brightness first.
Does higher refresh rate improve text clarity on macOS?
No-text clarity is primarily resolution, pixel density, and scaling. Higher Hz improves motion smoothness, not the underlying sharpness of static UI elements.
Why does the refresh rate option I expected not appear in macOS?
Your cable, hub, or the monitor's input mode may limit available link modes. Try a shorter/better cable and connect directly to the Mac before troubleshooting further.