For a 13-16-inch portable monitor on Mac, prioritize three things: reliable color (so macOS profiles behave predictably), enough perceived brightness with usable glare control for cafés/outdoors, and a one-cable USB-C power/video path that won't drain your MacBook. Choose size by workspace needs: 13-inch for ultra-light travel, 14-16-inch for multi-app productivity.
Quick comparison snapshot for on-the-go Mac displays
- Best all-around: a 14-16-inch IPS with USB-C (DP Alt Mode) + pass-through charging, and a matte/anti-glare surface.
- Most portable: a 13-inch slim panel when you often "ซื้อ จอพกพา 13 นิ้ว สำหรับ MacBook" for daily commuting.
- Most readable in bright places: a panel marketed as higher-brightness with stronger anti-glare (common ask: "จอพกพา สีตรง ความสว่างสูง สำหรับ Mac").
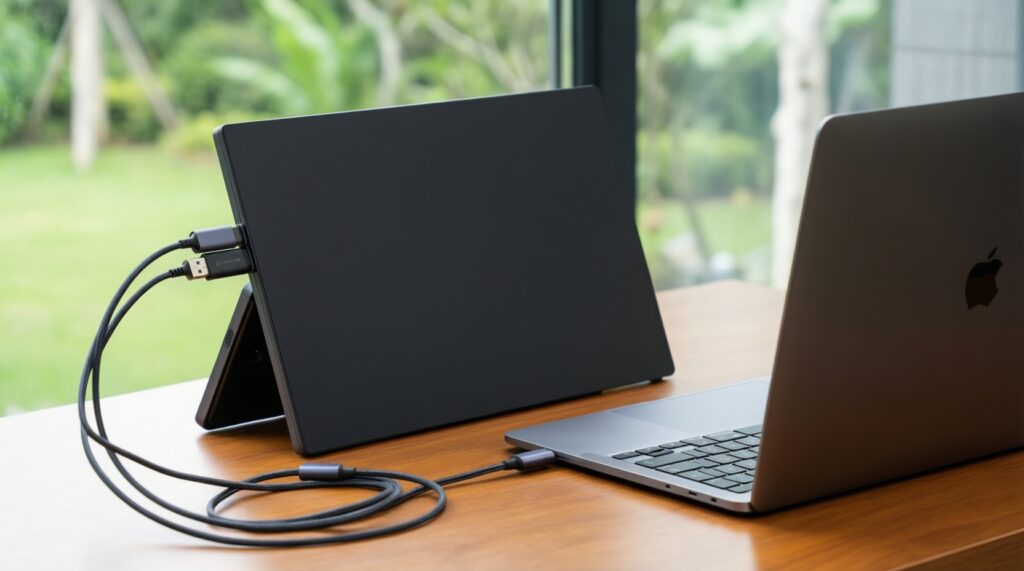
- Lowest friction setup: true one-cable "จอพกพา USB-C สำหรับ MacBook" with stable PD pass-through, plus a solid kickstand.
- Most desktop-like workspace: "จอพกพา 16 นิ้ว สำหรับ MacBook Pro" when you need two full-size app columns and fewer scroll breaks.
- Value filter: compare total kit cost (cable quality, stand, sleeve) when checking "จอพกพา สำหรับ Mac ราคา", not just the panel listing.
Color fidelity and gamut: choosing the right panel for Mac colour work
Start with your use-case (office docs vs. photo/video vs. UI design). Then verify these criteria before you commit:
- Panel type consistency: Prefer IPS-class panels for more stable viewing angles and fewer color shifts when you tilt the screen on a café table.
- Color management behavior: Look for EDID stability and a monitor that doesn't "fight" macOS by forcing aggressive dynamic color modes.
- Gamut target match: If your work is web/UI, prioritize accurate sRGB behavior; if you deliver wide-gamut work, confirm the monitor's wide-gamut mode can be disabled or properly profiled.
- Uniformity risk: Portable panels vary more in edge uniformity; avoid units with visible corner tinting if you do skin tones or product photos.
- Gamma options: A selectable 2.2-ish gamma and the ability to turn off "enhancements" helps your Mac output look predictable.
- White point control: If you can't set a warmer/cooler white point on the monitor, you'll rely more on macOS calibration and may lose headroom.
- 8-bit vs 6-bit+FRC expectations: Many portable monitors use temporal dithering; it can be fine, but check for banding in gradients and skies.
- Hardware controls: A usable OSD (or consistent side buttons) matters more than it seems when you need repeatable settings across locations.
Practical pick logic: If your deliverables are color-critical, choose the panel you can keep in one stable picture mode and profile once; if you mainly write/code, choose comfort (matte + stable brightness) first.
Brightness, contrast and anti-glare: ensuring outdoor readability
Outdoor readability is a system: panel brightness + surface finish + how you position it. Glossy can look punchy indoors but collapses in uncontrolled light. Matte reduces mirror reflections but can soften perceived sharpness. Use this matrix to match your work setting.
| Variant | Who it fits | Pros | Cons | When to pick it |
|---|---|---|---|---|
| 13-inch matte IPS (standard brightness) | Commuters, minimalists | Light pack; fewer reflections than glossy; quick to deploy | Less workspace; can feel dim in harsh daylight | If you travel daily and mostly work in shade or indoors |
| 13-inch glossy IPS (standard brightness) | Hotel/office users who like "pop" | High perceived contrast indoors; crisp look | Mirror-like reflections; requires careful positioning | If you rarely work near windows and want punchy visuals |
| 14-16-inch matte IPS (standard brightness) | Multi-app productivity | More room for side-by-side apps; generally easier ergonomics | Bigger footprint; needs a sturdier stand | If you do spreadsheets, timelines, or coding + docs together |
| 14-16-inch "high-brightness" matte IPS | Remote workers in cafés, coworking, travel lounges | Best chance at readability; pairs well with anti-glare | Often higher power draw; heat and throttling risk in hot climates | If "จอพกพา สีตรง ความสว่างสูง สำหรับ Mac" is your priority and you accept higher power needs |
| Touch-enabled glossy (any size) | Presenters, sketch-note workflows | Direct interaction; good for demos | Extra reflections and fingerprints; can introduce jitter on thin stands | If you actively use touch and can control lighting |
| OLED (typically glossy) | Contrast-focused media work | Deep blacks; strong perceived contrast | Reflection sensitivity; UI static elements may be a long-term concern | If you edit/video review in controlled light and want maximum contrast |
Compact size comparison: 13" vs 14-16" for Mac travel setups
| Size band | Color (what to look for) | Brightness (what to look for) | Ports (minimum practical) | Weight (how to think about it) |
|---|---|---|---|---|
| 13-inch | Stable sRGB-like mode; minimal tinting | Enough for indoor/café shade; matte helps most | 1× USB-C for video + power; bonus: 2nd USB-C for pass-through charging | Pick the lightest that still has a rigid chassis/stand |
| 14-16-inch | Better uniformity potential; more usable for layout work | Prefer "high-brightness" if you move locations often | USB-C DP Alt Mode; bonus: HDMI for fallback; PD pass-through if you want one-cable | Accept higher weight if it improves stability and viewing angle |
Portability factors: weight, thickness and mounting for mobile setups
Use scenario-first rules. They prevent you from buying a thin panel that's annoying in real life.
- If you work on small café tables, choose a monitor with a wide, stable kickstand or folio cover; otherwise the screen wobbles while typing.
- If you commute on motorbike/BTS with a tight bag, favor a 13-inch class monitor with a rigid backplate and a sleeve; thin plastic backs flex and show pressure marks.
- If you frequently share screens with clients, choose a 14-16-inch for easier group viewing and prioritize viewing-angle stability over ultra-thin design.
- If you use an iPad/phone as a second device already, a 13-inch portable monitor may be enough; allocate budget to better anti-glare and a better stand rather than larger size.
- If your goal is a "mini desk" anywhere, plan for mounting: a tripod thread or VESA-compatible adapter reduces neck strain more than any spec sheet improvement.
Connectivity and power: USB-C, Thunderbolt, PD and Mac integration
Follow this quick selection algorithm to avoid the most common Mac portable-monitor pitfalls:
- Confirm video over USB-C: your monitor must support DisplayPort Alt Mode over USB-C; otherwise it may require DisplayLink (extra drivers and latency).
- Decide your cable goal: if you want one-cable, look for USB-C video + power input with PD pass-through (monitor can charge the Mac while being fed by a charger).
- Check Mac port reality: for MacBook Air/Pro with limited ports, pick a monitor that doesn't steal your only USB-C for power without pass-through.
- Plan a fallback path: if you present often, HDMI on the monitor (or in your hub) prevents emergencies when USB-C handshakes fail.
- Audit your hub/dongle: many issues blamed on the monitor are actually low-quality hubs; test direct USB-C first, then add accessories.
- Validate resolution + refresh you need: ensure your chain (Mac → cable/hub → monitor) supports your target mode without flicker.
- Heat and power headroom: if you'll use "high-brightness" modes, assume higher power draw; bring an adequate charger to avoid battery drain.
Real-world performance: response time, refresh rate and image processing
- Overbuying refresh rate for office work: higher refresh can be nice, but stability and glare control usually matter more for mobile productivity.
- Ignoring scaling sharpness: macOS scaling can look soft on some portable panels; test your common app UI at typical distances.
- Trusting marketing color modes: "HDR" or "vivid" modes often distort tones; prioritize a neutral mode you can repeat.
- Assuming all USB-C cables are equal: many included cables cause intermittent black screens; use a known-good, full-feature USB-C cable for video.
- Not checking minimum brightness: in dim rooms, a monitor that won't go low enough causes eye fatigue even if its max brightness is fine.
- Accepting PWM flicker blindly: if you're sensitive to flicker, test at low brightness; portable monitors vary widely in comfort.
- Forgetting audio/volume routing: macOS may switch audio outputs when you connect/disconnect; avoid relying on monitor speakers for calls.
- Choosing touch without a stability plan: touch on a flimsy stand is frustrating; pair it with a rigid mount if touch is central.
Battery, charging strategy and travel workflow for remote productivity
- If you mostly write/code and commute daily: pick a 13-inch matte USB-C monitor with pass-through charging (balanced), or a simpler one-cable 13-inch (budget), or a sturdier premium 13-inch with better stand (pro).
- If you need true dual-screen productivity on the road: pick a 14-16-inch matte IPS (balanced), a "high-brightness" 14-16-inch for variable lighting (pro), or a 14-16-inch with HDMI fallback if you present often (budget-friendly convenience).
- If you do color-sensitive work away from your main display: pick the monitor that stays neutral in one mode and can be profiled; choose matte if you move locations, glossy only if you control light.
Best for frequent travel is typically a 13-inch one-cable setup with a rigid stand; best for heavy multitasking is a 14-16-inch workspace-first panel; best for variable lighting is a matte screen marketed for higher brightness, paired with a charger plan so your Mac doesn't slowly drain during long sessions.
Practical purchase and setup questions
Do I really need a 16-inch portable monitor for a MacBook Pro?
Choose "จอพกพา 16 นิ้ว สำหรับ MacBook Pro" when you regularly run two full-size windows side-by-side. If you mainly need reference material or chat/apps, a 13-inch is usually enough and easier to carry.
What's the safest "one cable" setup for Mac?
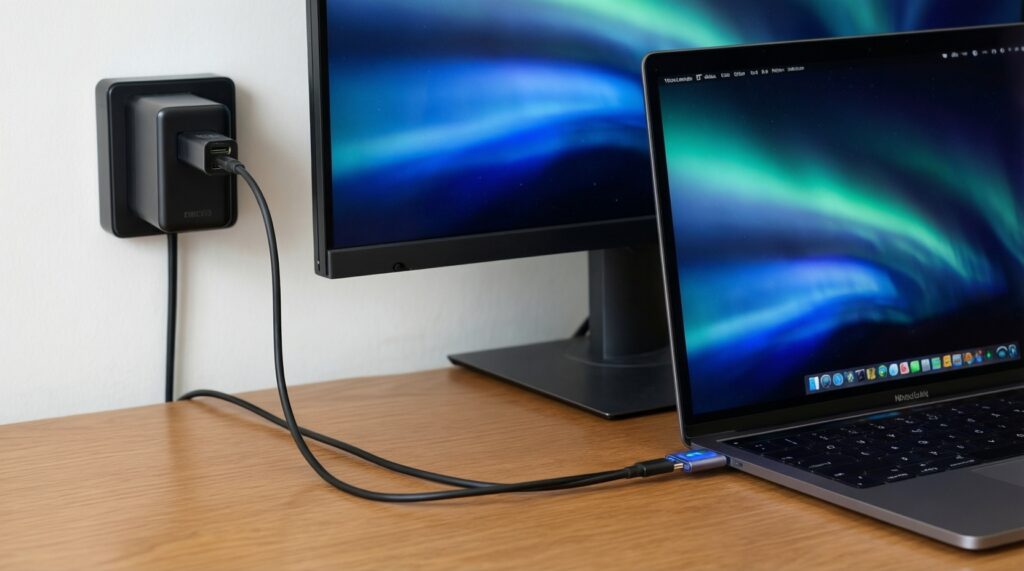
Use USB-C DP Alt Mode for video plus PD pass-through so the monitor can be powered by a wall charger while charging the Mac. This avoids battery drain and reduces disconnects versus powering the monitor only from the Mac.
How do I avoid surprise driver installs?
Pick a monitor that works via USB-C DisplayPort Alt Mode or HDMI. Avoid solutions that mention USB graphics adapters or DisplayLink unless you explicitly accept installing drivers.
Is glossy always worse outdoors?
Glossy can look great indoors, but reflections are harder to manage outdoors. If you work in cafés near windows, matte/anti-glare is the safer default for consistent readability.
What should I check before I "ซื้อ จอพกพา 13 นิ้ว สำหรับ MacBook" online?
Confirm USB-C video support, check that the stand is stable on a shallow desk, and ensure you have a known-good full-feature USB-C cable. If possible, verify return terms in case uniformity or tint is distracting.
How should I think about "จอพกพา สำหรับ Mac ราคา" without getting tricked by cheap listings?
Compare the full kit: cable quality, pass-through charging capability, stand/cover durability, and port selection. A slightly higher-priced unit can be cheaper over time if it avoids hub/cable replacements.
What's the fastest way to improve color accuracy on a portable monitor?
Disable vivid/HDR-like modes, set a neutral color mode, then run macOS calibration (or profile with a calibrator if you have one). Keep the same brightness level when doing color-critical tasks.