A good portable display for Mac field work is one that matches your carry profile (size/weight), your macOS scaling needs (resolution and usable UI), your color-critical requirements (gamut + calibration), and your real-world ports (USB-C, HDMI, or Thunderbolt). Choose by workflow first, then confirm cables, power, and a stable stand.
Quick criteria checklist for choosing a portable Mac display
- Pick a size you can actually carry daily (and that fits your bag and desk depth).
- Choose resolution based on macOS scaling comfort, not marketing labels.
- If you do design/photo: prioritize consistent color and a repeatable calibration method.
- Confirm one-cable video + power over USB-C (or plan the exact adapter chain).
- Prefer displays with robust stands/hinges; avoid "floppy" folio stands for on-site work.
- Plan power: where it will draw from (MacBook, wall charger, power bank) and under what load.
Optimal sizes and portability trade-offs
For on-location Mac workflows, size is mostly a choice between "always with you" and "actually comfortable all day." Use the smallest display that still solves your problem (timelines, dual docs, client review, tethered shooting).
- Compact carry (around 13-14 class): best if you commute daily, work in cafés, or set up on small tables.
- Balanced field setup (around 15-16 class): better for split views (code + docs, Lightroom panels, Excel + browser) while still portable.
- Desk-like mobile (around 17-18 class): useful for video editing or lots of panels, but it's bulky and needs a stable stand and more power planning.
When not to do it: if your on-site work is color-critical approval with clients and you cannot calibrate or control lighting, a portable panel may add risk. In that case, use the built-in Mac display or a known calibrated desktop monitor at the studio for final sign-off.
Resolution and pixel density for Mac workflows
What you'll need to decide and verify before buying:
- Your target "usable space" in macOS: check your current Display settings and note the scaling you like (larger text vs more space).
- Your Mac's output capabilities: confirm which port you'll use (USB-C/Thunderbolt) and whether you can drive the intended resolution at the refresh rate you expect.
- Your cable plan: a full-featured USB-C cable (video + data + power) is different from a charge-only USB-C cable.
- Workflow-specific resolution needs:
- Writing + admin: prioritize clarity and stable scaling; extreme resolution is less important than comfort.
- Photo/design: resolution helps with zoom judgment, but color stability and calibration workflow matter more.
- Video editing: if you truly need more pixels for preview and UI, consider a จอภาพพกพา 4K สำหรับ MacBook Pro-but only if your scaling and performance remain comfortable on-site.
Concise comparison table (profiles you can map to real products)
| Portable display profile | Typical size class | Resolution target | Color target | Ports to insist on | Price tier (not a quote) |
|---|---|---|---|---|---|
| Travel-light "one-cable" panel | 13-14 | FHD to QHD (comfort-first scaling) | Good sRGB consistency | USB-C (DP Alt Mode) + USB-C power passthrough | Budget to mid |
| Field creator panel | 15-16 | QHD or 4K (only if scaling stays usable) | Wide gamut preferred; stable uniformity | USB-C + optional HDMI; reliable OSD controls | Mid to premium |
| Client-review & presentation-friendly | 15-17 | FHD to 4K (depending on content) | Consistent brightness; decent viewing angles | USB-C + HDMI (simple compatibility) | Mid |
| Single-cable workstation-grade (when supported) | 14-16 | QHD to 4K | Creator-friendly, calibration workflow | จอภาพพกพา Thunderbolt สำหรับ Mac (if you specifically need TB features) | Premium |
For budgeting conversations like จอภาพพกพา สำหรับ Mac ราคา, treat "price" as a trade between: (1) stand/build quality, (2) color stability, and (3) one-cable reliability. Avoid choosing by resolution alone.
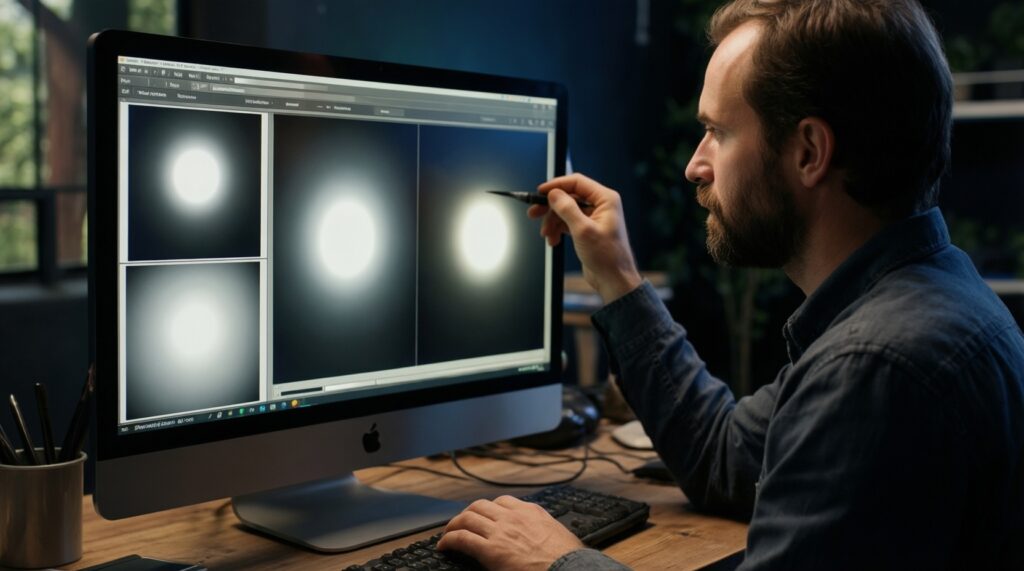
Color accuracy, gamut and calibration needs
-
Define what "color-correct" means for your job
For client-facing graphics or print prep, "looks nice" is not enough; you need repeatability. For general office work, prioritize readability and viewing angles instead.
-
Choose your target color space before shopping
Most web/UI work can live in sRGB; many creator workflows benefit from wider gamut, but only if you manage it correctly in apps and exports.
- If your goal is จอภาพพกพา สีตรง สำหรับงานกราฟิก Mac, prioritize consistent behavior at your typical brightness, not just a spec sheet claim.
-
Plan your calibration method (and do it safely)
Use a colorimeter if you have one; otherwise, rely on conservative settings and avoid making irreversible judgments on a non-calibrated panel. Calibrate in a stable indoor environment, not under mixed outdoor light.
- Set a reasonable brightness for your environment and keep it consistent.
- Disable "dynamic contrast" or aggressive "vivid" modes if present.
-
Set macOS and app color management intentionally
Use the correct display profile in macOS, and keep your editing apps color-managed. Mismatched profiles are a common cause of "washed out" or "too saturated" results.
-
Validate with known references
Open a small set of reference images you trust (skin tones, neutral grays, brand colors). Compare against your MacBook's built-in display in controlled lighting, and document the settings that match best.
Fast mode: on-site color-and-setup minimum (3-5 steps)
- Set the portable display to a neutral preset (standard/sRGB) and turn off vivid/dynamic modes.
- Match brightness to your environment, then keep it fixed for the session.
- In macOS, confirm the intended display profile and scaling, then restart the color-managed app.
- Check 2-3 trusted reference images before you export or present to a client.
Connectivity: ports, adapters, and Thunderbolt/USB‑C details
Use this verification checklist before you buy and again on day one. It prevents the classic "it charges but no picture" situation when you ซื้อ จอภาพพกพา USB-C สำหรับ MacBook.
- Confirm the display supports USB-C video (DisplayPort Alt Mode), not only USB-C power.
- Verify your cable is full-featured USB-C (video-capable), not charge-only.
- If the display has two USB-C ports, identify which one is video-in and which one is power-in/passthrough.
- Decide whether you need HDMI as a fallback for client gear or older adapters.
- If using a hub/dongle, confirm it supports the resolution/refresh you intend and doesn't conflict with power delivery.
- Check whether your workflow needs USB-A (mouse, card reader) and plan a hub accordingly.
- If you're shopping specifically for จอภาพพกพา Thunderbolt สำหรับ Mac, confirm what you gain: TB can simplify bandwidth-heavy docks, but many portable panels work perfectly over standard USB-C DP Alt Mode.
- Test wake/sleep behavior: close the MacBook lid (if you do clamshell) and confirm the display reconnects reliably.
Real-world setup example (fast implementation)
On-site photo cull + light edits: MacBook + portable display via one USB-C cable for video, plus a compact USB-C charger to power the display (or power passthrough if supported). Add a small USB-C hub only if you must attach an SD reader and a wired mouse. This keeps the video link stable and reduces adapter complexity.
Power options, battery life and charging strategies
Common mistakes that cause flicker, random disconnects, or a drained MacBook during field work:
- Using the MacBook battery to power the display all day without a charging plan.
- Assuming any USB-C port/cable supports video + power (many do not).
- Running the display at maximum brightness unnecessarily, increasing power draw and heat.
- Powering the display from a weak charger or low-output port, causing intermittent resets.
- Chaining too many devices through one hub (display + storage + charging) and hitting bandwidth/power limits.
- Expecting a power bank to behave like a wall charger; some banks negotiate power differently and may not sustain the load.
- Ignoring cable length/quality; long or low-quality USB-C cables can cause instability.
- Mixing "fast charge" expectations with simultaneous high load (editing + external display) without checking whether the Mac actually shows "Charging" vs "Not Charging."
Ruggedness, stands and mounting for field use
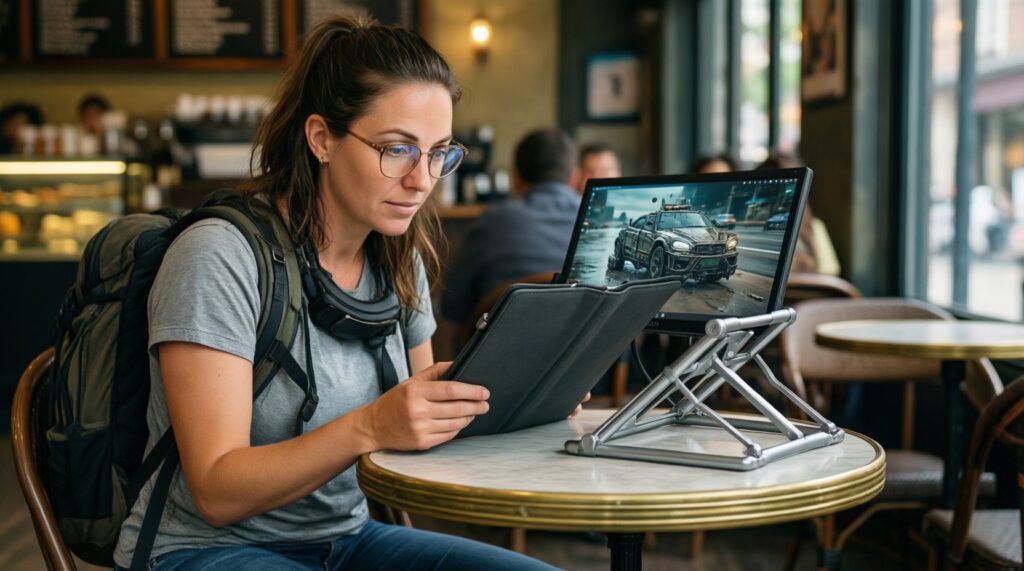
Choose the physical setup based on where you'll place the display and how often you move between spots.
- Folio stand (built-in cover): light and simple for cafés/hotels; less stable on uneven surfaces and can sag at steep angles.
- Kickstand hinge (integrated metal stand): faster setup and more stable for desks and client tables; check wobble before committing.
- Tripod/arm mount support: best for tethered shoots, tight desks, or standing workflows; use it when you need precise height/angle and repeatability.
- Hard case + screen protector strategy: use when your bag is crowded with gear; it reduces pressure damage and micro-scratches during travel.
Common technical concerns and buying objections addressed
Will any USB-C cable work for a portable Mac display?
No. You need a USB-C cable that supports video (DisplayPort Alt Mode). Charge-only cables can power the display but won't carry the image.
Do I need Thunderbolt to get a reliable connection?
Usually not. Most portable displays work well over standard USB-C video; choose จอภาพพกพา Thunderbolt สำหรับ Mac only if your overall dock/workflow requires Thunderbolt-specific bandwidth or chaining.
Is a 4K portable display always better for MacBook Pro?
No. A จอภาพพกพา 4K สำหรับ MacBook Pro helps only if macOS scaling remains comfortable and performance stays smooth for your apps. Otherwise, a lower resolution can be more practical on the road.
How do I avoid "washed out" colors when presenting to clients?
Use a neutral preset (often sRGB/Standard), avoid vivid modes, and keep brightness consistent. If possible, validate with a small set of reference images before you present.
Can I trust factory color claims for graphic design work?
Treat them as a starting point. For จอภาพพกพา สีตรง สำหรับงานกราฟิก Mac, plan a repeatable calibration/validation routine; otherwise, reserve final approval for a known calibrated environment.
What's the simplest buying path if I just want one cable?
Look for USB-C video input plus power passthrough, then buy one known-good full-featured USB-C cable. This is the most straightforward route when you ซื้อ จอภาพพกพา USB-C สำหรับ MacBook.
How should I think about price without getting tricked by specs?
For จอภาพพกพา สำหรับ Mac ราคา, pay for reliability first: stable stand, consistent panel behavior, and dependable one-cable connectivity. Resolution alone rarely predicts real-world satisfaction.