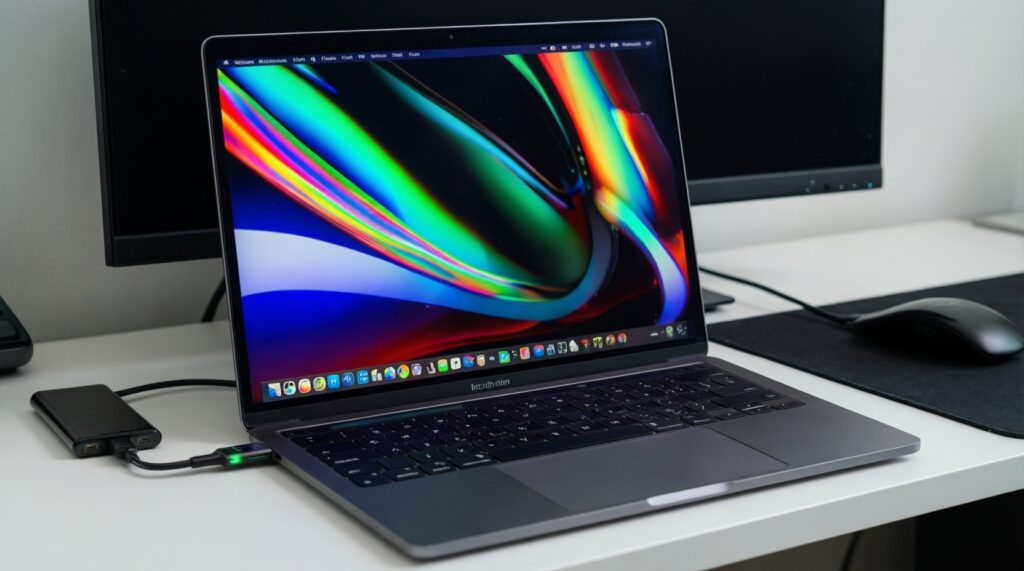
A travel-ready portable monitor for Mac should run on a single USB‑C/Thunderbolt cable, stay lightweight in a carry-on, be bright enough for cafés, and deliver reliable color for edits. Prioritize USB‑C DisplayPort Alt Mode, stable power behavior, a matte-friendly surface, and a repeatable macOS color workflow so you can plug in and work anywhere.
Quick spec snapshot for travel-ready Mac monitors
- Single-cable USB‑C video (DisplayPort Alt Mode) + power; avoid "charge-only" USB‑C ports.
- Stable brightness behavior on bus power; optional external power when you need max brightness.
- Color target: consistent sRGB/P3 handling with usable factory tuning and profile support.
- Physical: rigid chassis, dependable kickstand/cover, and sensible port placement for travel.
- Mac-friendly scaling: comfortable default resolution and sharp text without odd overscan.
- Practical extras: passthrough charging, USB hub only if it doesn't break video stability.
Why single‑cable USB‑C/Thunderbolt is nonnegotiable for Mac travelers
- Must-haves: USB‑C with DisplayPort Alt Mode; a known-good USB‑C cable rated for video; macOS-compatible resolution list (no forced TV modes).
- Nice-to-haves: Thunderbolt compatibility, passthrough charging, a second USB‑C port for flexible cable routing.
Single-cable setups reduce adapter failures, ground-loop noise, and "why is it not detected" moments-especially on planes, in coworking spaces, and in Thai cafés with mixed-quality outlets. This is the core requirement when you ซื้อจอภาพพกพา USB-C สำหรับ Mac because it determines whether the monitor behaves like a true second display or a fragile gadget.
Don't force a single-cable setup when the monitor is HDMI-only (you'll need a dongle), when you require guaranteed peak brightness without AC power, or when you run color-critical client proofing that demands a hardware-calibrated reference display.
- Carry one "known-good" USB‑C video cable and label it as your display cable.
- Prefer monitors that expose clear USB‑C video input selection (auto switching can fail).
- Test your full chain (Mac → cable → monitor) before a trip, not at the gate.
Portability essentials: weight, footprint and durable construction
- Must-haves: A rigid backplate, a stable stand (or folio case), and a screen protector strategy (sleeve/folio) to survive backpacks.
- Nice-to-haves: VESA holes for a hotel desk arm, anti-glare film, and a case that doubles as a stand.
For จอภาพพกพาสำหรับ Mac น้ำหนักเบา, prioritize "packability" over thinness marketing: a monitor that doesn't flex, doesn't wobble, and doesn't force awkward cable bends will be faster to deploy and less likely to fail. In Thailand, frequent scooter rides and tight bags make stand stability and edge protection more important than ultra-slim profiles.
| Travel priority | What to look for | Common tradeoff | Quick check in-store / on arrival |
|---|---|---|---|
| Fast setup | USB‑C DP Alt Mode, clear input switching | Fewer ports, fewer "dock" features | Plug USB‑C once: does it show image + charge behavior immediately? |
| Backpack durability | Rigid chassis, protected corners, stable folio stand | Slightly heavier feel | Press lightly on center-back: minimal flex; stand doesn't slide |
| Outdoor-ish brightness | High perceived brightness, matte or low-glare coating | More power draw | Max brightness on battery: does it stay stable or step down quickly? |
| Color confidence | Consistent white point, profile support, decent uniformity | Higher จอภาพพกพา Mac ราคา | Open a neutral gray image: check for obvious tint shifts corner-to-corner |
| Sharp text | Sensible scaling options; consistent pixel layout | Some 4K panels can be harder to scale comfortably | In macOS Display settings: confirm readable "Looks like" options |
- Choose a stand you can trust on a small café table; wobble wastes time and hurts ergonomics.
- Protect the screen surface first; scratches are more damaging than minor casing scuffs.
- Route the USB‑C cable to avoid side pressure on the port during transport and use.
Display performance: brightness, color gamut, calibration and uniformity
- Must-haves: Brightness that remains usable on your Mac's battery, a predictable color mode (sRGB/P3), and no aggressive auto-dimming you can't disable.
- Nice-to-haves: Hardware LUT modes, uniformity compensation, and a monitor that includes an ICC profile (still verify it).
- Charge your Mac above a comfortable level before testing brightness and stability.
- Bring two test images: a neutral gray gradient and a skin-tone photo you know well.
- Update macOS before travel if you rely on external display color profiles.
- Pack a microfiber cloth; smudges can look like uneven backlight in dim rooms.
-
Confirm you're in a true "monitor" mode, not a TV-like mode.
On first connect, open macOS Display settings and ensure the monitor isn't forcing limited range or overscan behavior. If the screen looks washed out, look for the monitor's RGB/PC mode in its OSD (on-screen menu).
- If using HDMI via a dongle, explicitly switch the monitor to "PC"/"RGB" mode if available.
-
Stabilize brightness before judging color.
Set the monitor to a fixed brightness (disable auto brightness/eco modes) and wait briefly for it to settle. Bus-powered monitors may lower brightness when the Mac battery is low or when multiple devices share power.
- If brightness keeps stepping down, test with external power (wall charger or power bank) to isolate power limits.
-
Select the right color preset for your work (sRGB vs wide gamut).
For web and general content, use sRGB if the monitor offers it. For Apple-wide-gamut workflows and photos, wide-gamut/P3 can be appropriate, but only if your apps are color-managed.
- This is the deciding factor when choosing a จอภาพพกพาสีตรงสำหรับงานกราฟิก Mac.
-
Run macOS color profile setup and verify with real images.
In macOS, assign or create an ICC profile for the display, then verify using your known images (neutral gray, skin tones, brand colors). Don't rely on "vivid" presets for editing.
- If you travel between lighting environments, use a consistent target (same brightness and white point) to reduce surprises.
-
Check uniformity quickly and decide if it's acceptable for travel.
Open a full-screen mid-gray image and look for obvious corner tinting or brightness hot spots. Minor variation is normal on portable panels; reject units with distracting patches that affect real work.
- If you plan a จอภาพพกพา 4K สำหรับ MacBook, be stricter: higher detail makes unevenness more noticeable in gradients.
- Lock one "editing" preset and don't change it mid-trip; consistency beats perfection on the road.
- Verify color with your own reference images, not store demos.
- If 4K scaling feels cramped, choose comfort over spec bragging-your eyes and speed matter.
Power and connectivity: Mac charging, passthrough and adapter strategy
- Must-haves: A reliable USB‑C video path; a charger you trust; at least one backup cable.
- Nice-to-haves: Passthrough charging that doesn't drop the display, and a compact multiport adapter for hotel TVs/projectors.
- Monitor shows image with a single USB‑C cable and stays connected when you open/close the Mac lid.
- No random disconnects when you plug in AC power to the Mac or the monitor.
- Brightness remains stable at your chosen level during normal work.
- USB‑C cable orientation/port choice doesn't change behavior (some monitors have one "full" USB‑C port).
- Passthrough charging (if used) charges the Mac without flicker or periodic black screens.
- Audio routing behaves as expected (or is disabled if you don't need it).
- Sleep/wake returns the image without unplugging cables.
- Your adapter plan covers HDMI-only situations without becoming your default setup.
- Standardize on one travel power layout: (A) Mac-powered monitor for mobility or (B) externally powered monitor for stability.
- Keep a short USB‑C cable for desk use and a longer one for hotel layouts; don't stretch a tight cable.
- If you care about predictable behavior, avoid chaining too many hubs between Mac and monitor.
Practical setup: macOS color workflow, profiles and on‑the‑road calibration
- Must-haves: A repeatable macOS profile choice, consistent brightness target, and color-managed apps for editing.
- Nice-to-haves: A compact calibrator (if you already own one) and a saved "Travel" display preset in the monitor OSD.
- Editing in non-color-managed apps and blaming the monitor when colors differ between apps.
- Using a "Vivid/Game" preset for design work; it boosts saturation and breaks predictability.
- Forgetting that ambient light changes your perception; a warm hotel lamp can make the screen look too cool.
- Mixing profiles (assigning the wrong ICC to the portable monitor) after macOS rearranges displays.
- Judging uniformity while the panel is dirty or under harsh reflections.
- Expecting consistent brightness on bus power when the Mac is in low-power mode.
- Using low-quality USB‑C cables that intermittently drop to USB 2.0 behavior or lose video.
- Assuming "4K" guarantees sharpness; scaling and panel quality matter more for text comfort.
- Create a simple "Travel profile" routine: fixed brightness, fixed preset, verified ICC-repeat it every trip.
- Keep one folder of reference images for quick checks; it saves time and reduces second-guessing.
- If you calibrate, do it in a stable lighting moment (evening hotel room) and keep settings unchanged afterward.
Real-world selections: recommended models, pros/cons and tradeoffs
- Must-haves: USB‑C video + power in one cable, stable stand, and an OSD that lets you lock a sane color mode.
- Nice-to-haves: Touch support (only if your apps benefit), built-in battery (only if you accept extra weight), and a USB hub (only if it's stable).
Because availability shifts by store and region, choose by class and checklist rather than chasing one exact model. Use these options to match your budget and priorities, including when comparing จอภาพพกพา Mac ราคา across Thai retailers.
-
USB‑C single-cable "workhorse" portable monitor (balanced travel choice).
Pros: simplest setup, fewer adapters, fastest deployment. Cons: peak brightness may be limited on bus power; color may need profiling.
- Buy if your goal is plug-and-play productivity and reliable second-screen use.
- Skip if you need guaranteed maximum brightness without external power.
-
4K-focused portable monitor for detailed UI and media.
Pros: crisp detail, good for timelines and dense dashboards. Cons: scaling can be fiddly; power draw and heat can be higher.
- Buy if you specifically want a จอภาพพกพา 4K สำหรับ MacBook and you're comfortable tuning scaling.
- Skip if you work long sessions in mixed lighting and want effortless readability.
-
Color-first portable monitor for design/photo travel edits.
Pros: more predictable color modes and better consistency for creative work. Cons: typically higher cost and may be less bright on battery.
- Buy if your priority is a จอภาพพกพาสีตรงสำหรับงานกราฟิก Mac and you use color-managed apps.
- Skip if you primarily need spreadsheets, terminals, and general office work.
-
Ultra-light minimalist monitor (maximum portability).
Pros: easiest to carry; good for frequent movers. Cons: more flex, weaker stands, and more visible uniformity issues.
- Buy if "จอภาพพกพาสำหรับ Mac น้ำหนักเบา" is your top requirement and you accept compromises.
- Skip if you often work on unstable tables or need durable build quality.
- Before you buy, confirm the listing explicitly supports USB‑C video (not only power); that's the core of ซื้อจอภาพพกพา USB-C สำหรับ Mac.
- Pick your "non-negotiable" (brightness, color, weight, or single-cable stability) and let the rest be tradeoffs.
- Do a five-minute acceptance test on day one so you can return quickly if something is off.
Typical setup problems and quick fixes for mobile Mac displays
Why does the monitor charge but show no image over USB‑C?
The USB‑C port/cable may be power-only. Use a USB‑C cable rated for video and confirm the monitor's USB‑C port supports DisplayPort Alt Mode.
How do you fix a washed-out image when macOS detects the display?
Switch the monitor OSD to PC/RGB mode if available, and avoid TV-oriented limited-range settings. If you're using HDMI via an adapter, try a different adapter or force RGB/Full in the display settings where possible.
Why does text look blurry even when the resolution seems correct?
Change the macOS "Looks like" scaling option and avoid odd intermediate scalings that reduce sharpness. If the panel is 4K, pick a comfortable scaled mode rather than running native tiny UI.
Why does the display disconnect when you plug in a charger?
This is usually power negotiation or a flaky hub/cable. Test direct Mac → monitor USB‑C first, then add charging/passthrough back one piece at a time.
How can you get closer color matching with the MacBook screen?
Assign the correct ICC profile to the portable monitor and use a neutral preset (sRGB or a standard mode), not "Vivid." Remember that different brightness and lighting will still make them look different to your eyes.
How do you stop brightness from changing by itself?
Disable auto brightness/eco modes in the monitor OSD and avoid Low Power Mode when you need stable brightness. If it still shifts, power the monitor externally instead of relying on bus power.